Paragen is the first multi-chain metaverse launchpad with a special focus on NFT, Gaming and Metaverse-based Dapps. Multi-chain is their key USP. Project has access to the best projects across multiple chains so they don't compromise on the quality of launched projects by stressing out from deal flow congestion, as is the case with even some mature launches in the industry. It had a major upgrade to its Tier System to allow for a fairer system and a lower barrier to entry compared to other launch pads. This was a community-inspired upgrade. Paragen Multichain is a Launhcpad.
Exclusive Metaverse, GameFi and NFT offerings: Through rigorous screening processes and sophisticated research reports, their communities will have a portal to access safe, secure and prestigious projects in one centralized location. Creating a gateway to a virtual tomorrow.
Previously Paragen followed a 4-tier system with a higher entry barrier with lower pool weight per tier. The ATLAS upgrade will greatly improve Paragens ecosystem with an 8-tier system with improved pool weight fairness. The Atlas upgrade will continue to give ALL users guaranteed allocation for staking $RGEN tokens. Paragen Launchpad has a Refund system, but we have not been able to find any articles about it or the terms under which it is Refunded.
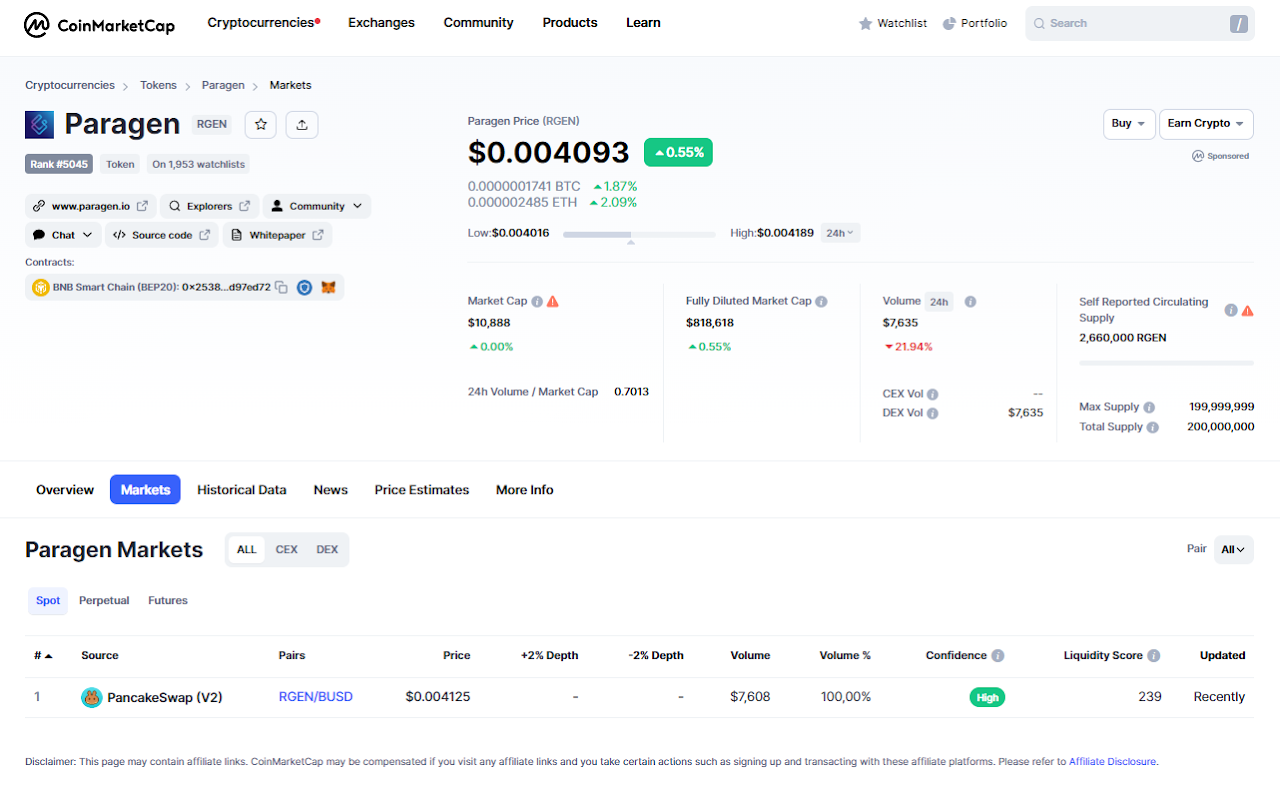
You can get Paragen on Pancakeswap.
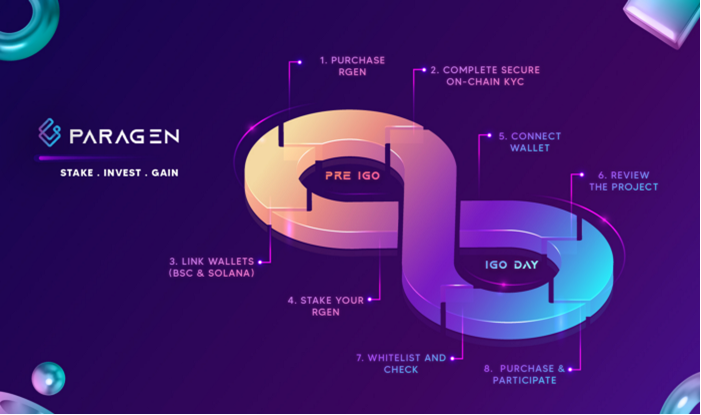
Then you need to go to the Paragen Launchpad Staking page and first connect the wallet and start staking transactions.
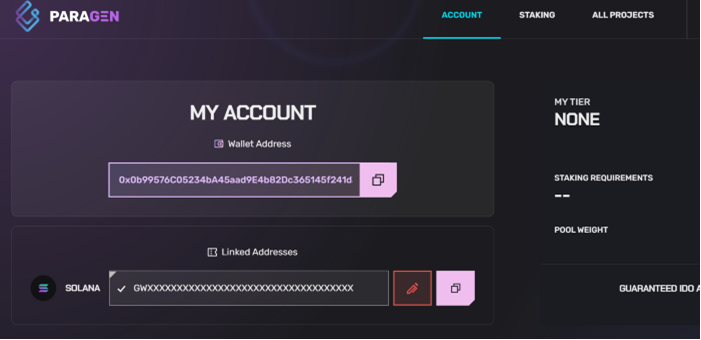
Step 1: Paragen is BSC specific and will be live on the BSC Main Network, so once you have linked your 0x bsc main network wallet, you have the option to link a solana address to your account. We can launch Solana projects and since Solana uses a different wallet, we have integrated a section to link your Solana Wallet to your main account. Solana Supported wallets include: Trust Wallet, Solflare, Phantom etc.
Step 2: We enter the Staking section on the Paragen site and press the Connect button.
Step 3: We connect to the Staking page by giving confirmation from your wallet.
Step 4: Staking is an integral part of participation as you need to stake your RGEN tokens to participate. To participate, stake your RGEN tokens at the desired tier that corresponds to your token amount.
Staking Awards
Paragen has an attractive staking reward system and should participate in upcoming IGOs.
Since snapshots are taken 24 hours before the start of each project IGO, you must stake your RGEN tokens 24 hours before the IGO to be whitelisted.
Paragen currently only uses a single staking system, which means you only need to stake RGEN to collect rewards and participate.
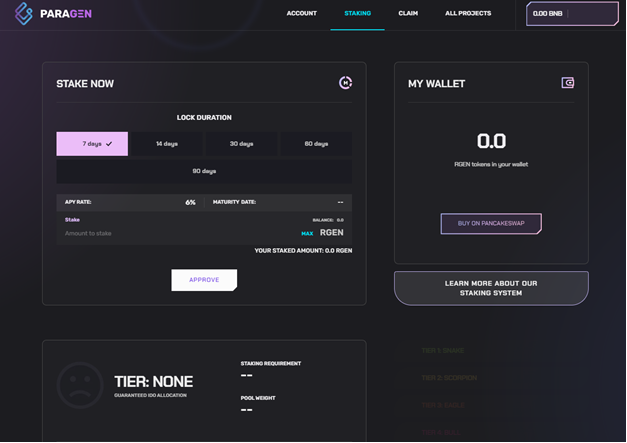
The current Lock, Join and Win system is as follows according to the staking period. Note that the minimum staking period is 7 days.
Staking Duration and Rewards:
- 7 days - 6% per year
- 14 days - 13% YYY
- 30 days - 30% YYY
- 60 days - 65% FTL
- 90 days - 80% FTL
Early/Early Redemption - Tokens remain locked until the maturity date you stake them. However, a 5% staking penalty fee will be charged if staking is not done before the maturity date.
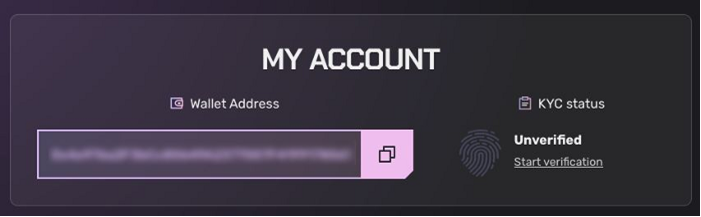
Step 5: Secure KYC Process on Chain
A prerequisite to join is that you only need to KYC ONCE for your wallet to be accepted. This is to ensure compliance, but remember that we ensure FULL security of your information by storing it On-Chain with Fractal. This is also to minimize dual logins from multiple wallets owned by the same user. Fractal is the service provider 3rd party used by Paragen
Step 6: When you connect your wallet, your KYC Status will appear as Unverified. Complete your KYC process on the Fractal site by clicking Start Verification.
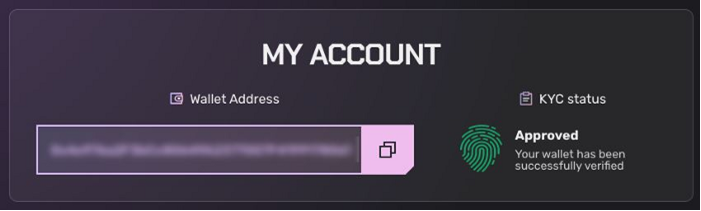
Step 7: When the KYC process is completed, your KYC Status will appear as Approved in your Account Information section and we have completed the process.
Step 8: By clicking on My Account, you can also define your wallet addresses for other chains.
Connect your wallet with metamask or walletconnect. The supported chain is BSC, so please make sure you are on the right network.
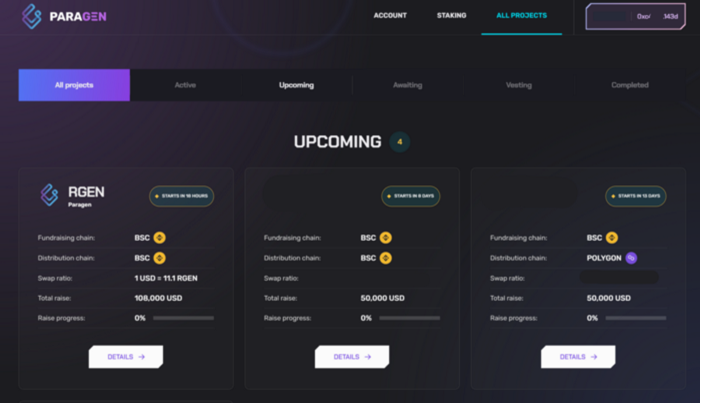
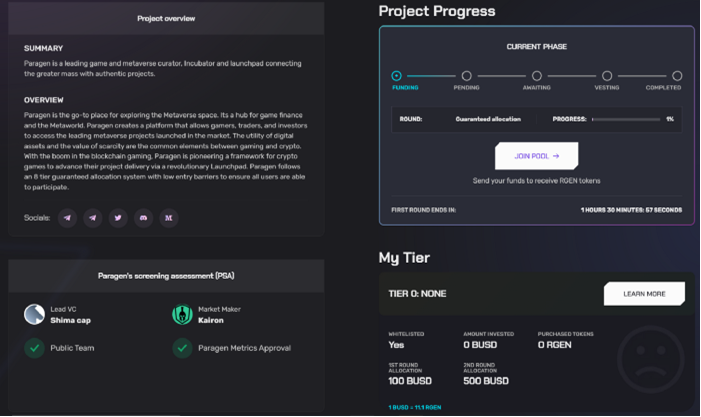
Step 1 : Click on All Projects in the top bar where you will find the projects displayed when clicking on Paragen IDO.
Step 2: As soon as you enter the site, you will notice that it says "Now active" in the middle and the progress bar goes to "Fundraising". Click on Join Pool.
Note: Under "My Tier" you will be able to see whether you are whitelisted or not, as well as the amount invested, coins purchased and the Max allocation per round. In Picture B we can see that I am whitelisted but have not yet invested.
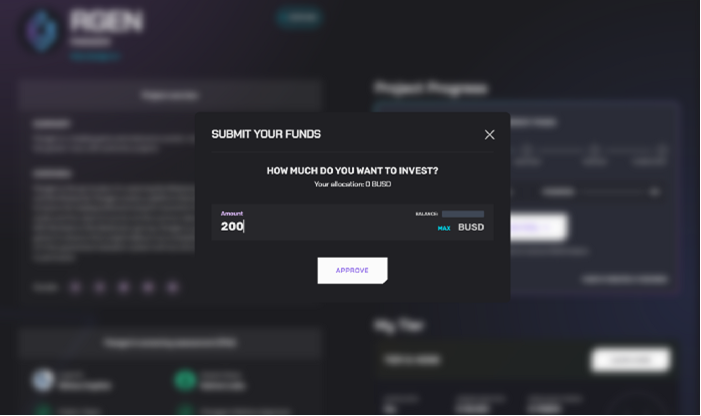
Step 3: After clicking Join pool, you will be presented with the Send your funds page. Since it's powered by a smart contract and not managed by the user, you must first click Approve before proceeding. Once you have approved, you can move on to the next steps.
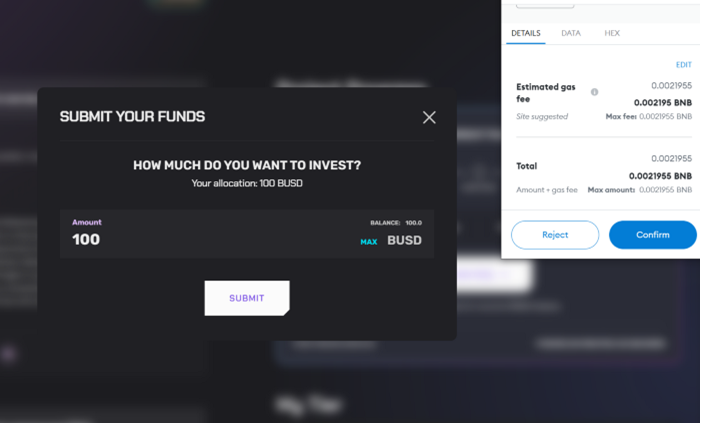
Step 4: Add your allocation or just click max to perform the max allocation and then click submit. You will then be asked to confirm the operation on metamask. press confirm
Step 5:
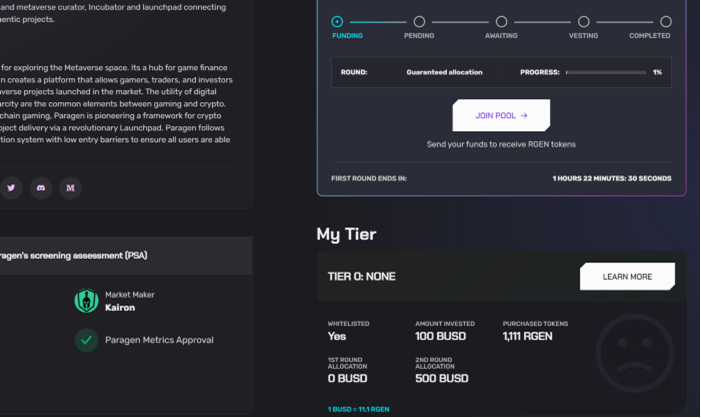
You can now see that the round 1 allocation is now set to "0 BUSD" and the deposited Amount is 100 BUSD and the purchased Tokens show 1.111 RGEN.
In case of round 2, you will be able to follow the same steps.
In case round 1 is not completely filled, FCFS will open immediately after the first phase ends. You will be able to participate further with a maximum limit of USD 500 per user.
Step 6: When the IDO process is finished, it will now look like the following.
Step 7:
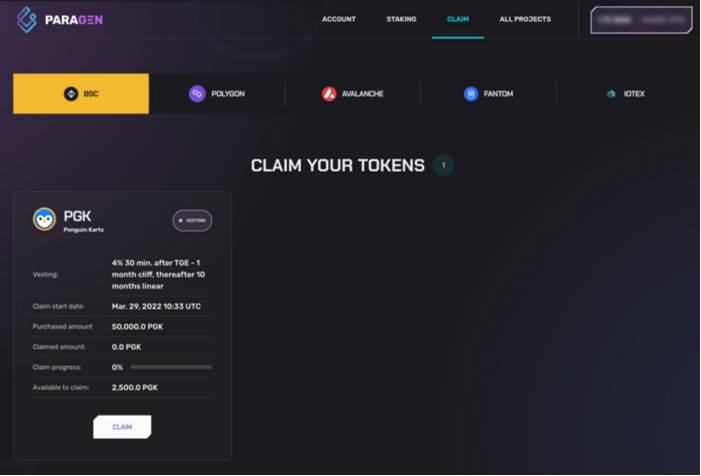
Claim Portal Introduction
The claim portal is for users who claim tokens for the projects they participate in.
You asked for it and we delivered!!! We launched the claim portal as a simple and easy way for all users to manage their tokens themselves. This is to ensure full transparency for both the community and the projects. Tokens will be locked in vesting contracts and made available for claiming during the respective vesting periods.
We replaced the Airdrop distribution method with Claiming. All networks offer extremely cheap gas fees and therefore make claiming cost-effective for users.
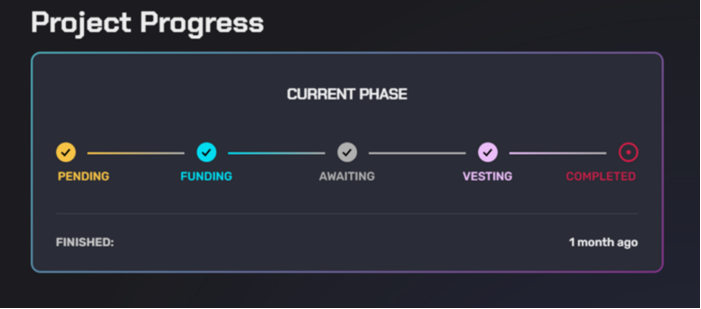
TRACK ALL YOUR INVESTMENTS AND PROGRAMS:
We also launched the portal to make everything super cohesive and to act as a calendar for the community. The information displayed on the per-project claim portal will be the Claim amount, Claim Start date, the amount you have purchased, a Claim progress bar to let you know how much you have claimed so far, and the Available tokens that can be claimed.
Simple Steps How to claim your tokens:
1.Go to our Launchpad
2.Click on "REQUEST REQUEST" in the top header.
3.Click on the relevant chain corresponding to the main network deployment of the project. For example, Penguin cards are deployed and distributed on the "Phantom Network". In this case, we would click on the "Phantom" button.
4.When you see the project displayed, click "claim" and sign the transaction through the meta mask to claim your tokens.
Congratulations!!! You have successfully claimed your tokens and can now use it for all projects moving forward.